
export random groups google classroom
How to Export Random Groups to Google Classroom – Step-by-Step Guide
Learn how to take the random groups you’ve generated and get them into Google Classroom for assignments, group work, and collaborative learning. Follow our simple step-by-step guide with real examples.
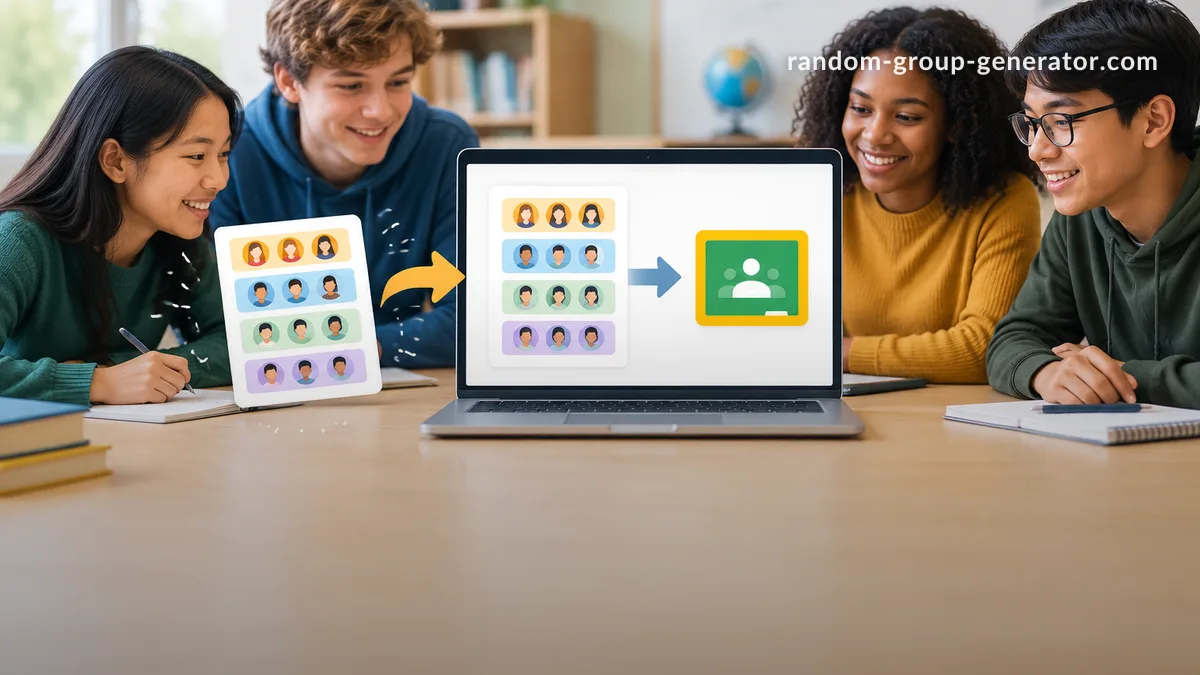
You’ve just used a free tool to create perfectly balanced random groups for your next activity. Now you need to take those groups and get them into Google Classroom. But Classroom doesn’t offer a “paste my group list” button. If you’ve been copying names one by one, there’s a faster way. This guide shows you how to export random groups from the Random Group Generator and get them working inside Google Classroom assignments in just a few minutes.
Why Export Random Groups to Google Classroom?
Google Classroom is a powerful platform for distributing work and communicating with students. Its “Group of students” option lets you assign differentiated tasks, labs, or discussions to specific small groups. The catch is that forming those groups manually takes time—time you could spend on instruction.
When you export random groups from a purpose-built generator, you eliminate the guesswork. Instead of trying to balance personalities, skill levels, or friendships by hand, you get fair, instant groups. Exporting those groups means you can quickly select the right students for each assignment group, without retyping.
Common scenarios where this workflow helps:
- A middle‑school science teacher needs five lab groups for a hands‑on experiment.
- A high‑school English teacher wants new discussion groups every two weeks to keep conversations fresh.
- A corporate trainer is using Classroom to run a workshop and needs breakout groups that change each session.
In each case, you generate the list once, then use the exported list as your reference while setting up the assignment.
Step 1: Generate Balanced Random Groups
First, create your groups. Head to the Random Group Generator (it’s free, no sign‑up required).
- Enter student names. Type them in, or copy your entire class roster from Google Classroom or a spreadsheet and paste it into the tool.
- Set how you want to split. You can choose a fixed number of groups or a fixed number of students per group. For most Classroom assignments, specifying the number of groups works best.
- Click “Generate Groups.” The tool instantly shuffles names and displays balanced groups. You can regenerate if you like a different arrangement.
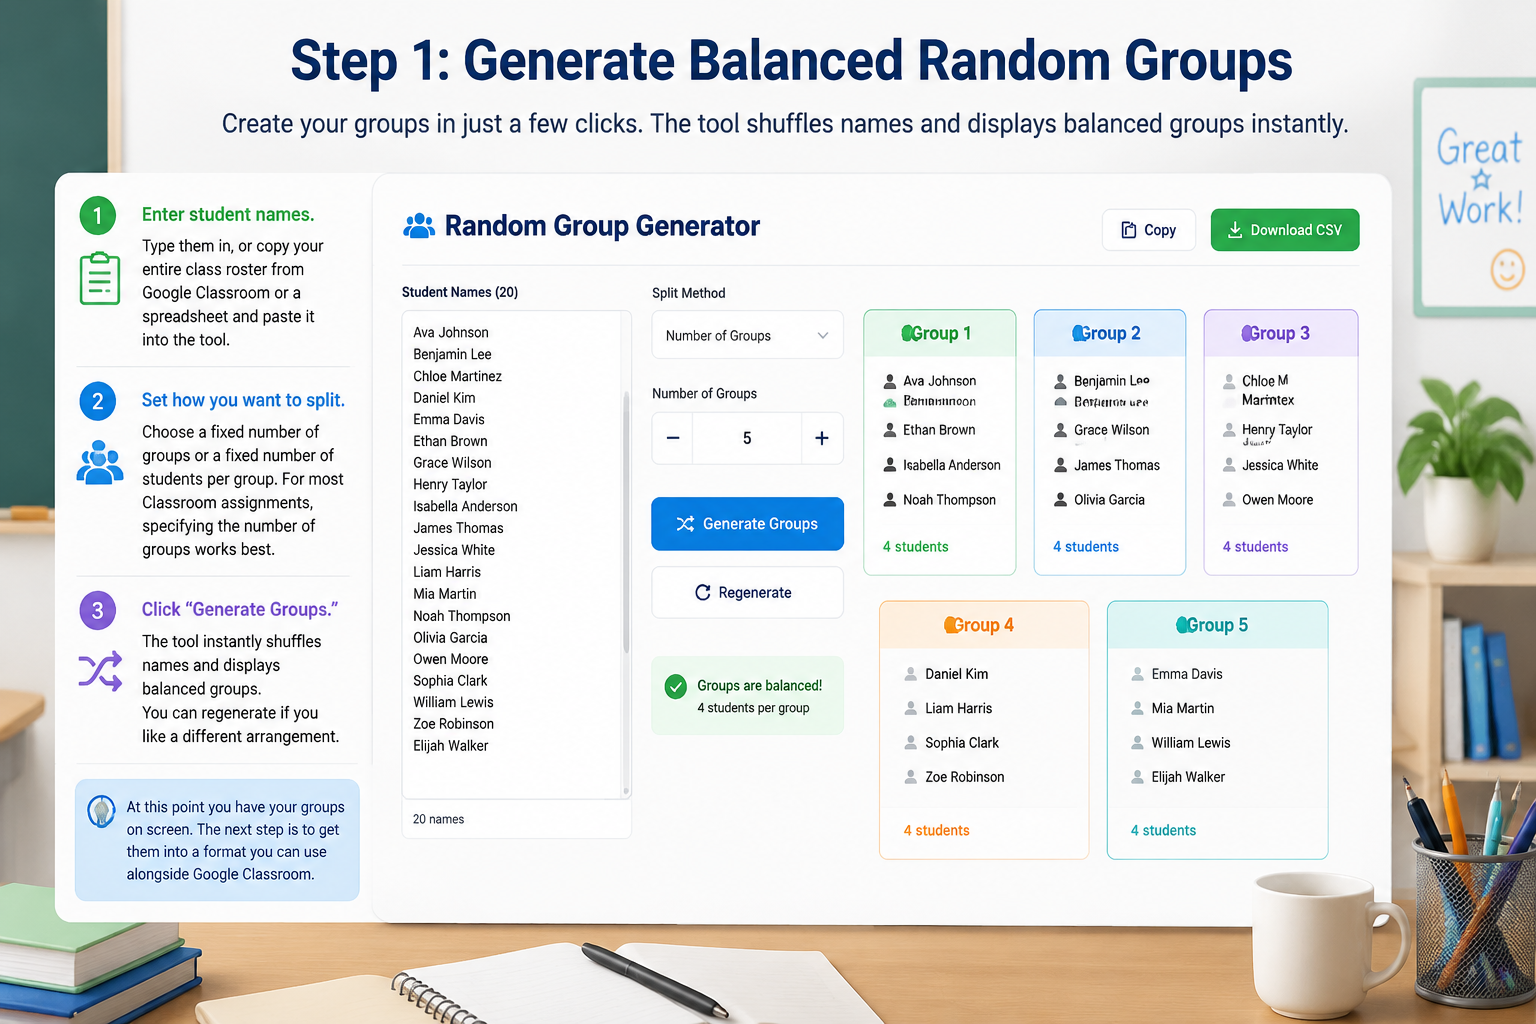
At this point you have your groups on screen. The next step is to get them into a format you can use alongside Google Classroom.
Step 2: Copy and Format the Group List
The generator offers two easy ways to export your groups:
- Copy to clipboard: Click the “Copy” button. The entire group list is copied as plain text, with group headings and names.
- Download as CSV: Choose “Download CSV” if you want to open the list in Google Sheets or Excel. The CSV puts each student in a row with a group label, which is handy for record‑keeping.
For the Classroom workflow, the clipboard copy is often enough. But pasting it into a Google Sheet gives you a quick reference that you can leave open in a separate tab while you work in Classroom.
Example of pasted group text
Group 1
Maria Santos
James Chen
Aisha Khan
Group 2
Leo Wright
Emma Rodriguez
...
If you want to find names faster during the next step, place each group in its own column inside a sheet. That way you can scan down a column instead of reading a long text block.
Step 3: Use the Groups in Google Classroom Assignments
Now you’ll take that exported group list and apply it to a Classroom assignment. Google Classroom doesn’t import group files directly, so you’ll manually select students—but the copied list makes it lightning fast.
- Open Google Classroom and go to the class where you want the assignment.
- Click “Classwork” then “Create” and choose an assignment type. (You can also edit an existing draft.)
- In the assignment creation screen, look for the “For” dropdown on the right side. Click it and select “Group of students.”
- A modal opens with your entire class roster. Use the search box at the top. Type the first name from Group 1 and check the box when it appears. Continue for each name in that group.
- Once you’ve selected all members of Group 1, give the group a name at the bottom of the modal (e.g., “Lab Group A”) and click “Save.”
- Repeat for the remaining groups. If the assignment is identical for all groups, you can duplicate the first assignment and change only the group selection for each copy.
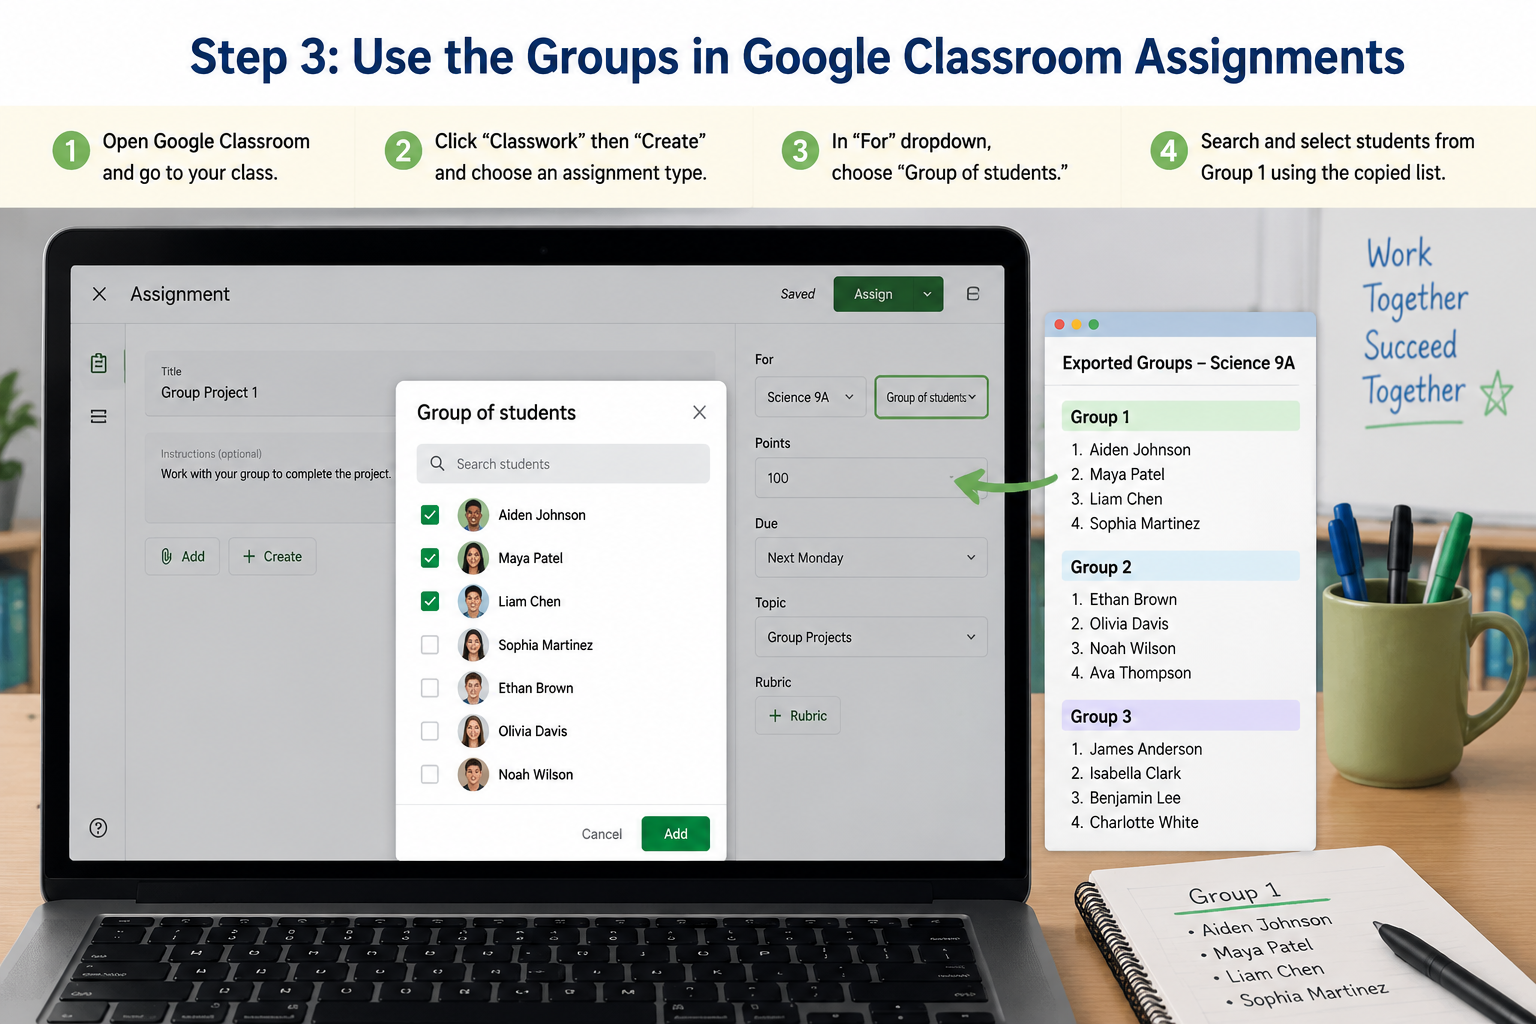
Because the search field filters names instantly, you can select even a large group in under 30 seconds. The whole process—from generation to fully set‑up assignments—takes less than five minutes once you’re familiar.
Real Example: Science Lab Groups in 5 Minutes
Ms. Rivera teaches 8th‑grade physical science. She has 28 students and wants seven groups of four for a density lab. Here’s her complete flow:
- She copies her roster from Classroom’s “People” tab (just the names) and pastes them into the Random Group Generator.
- She sets the tool to create 7 groups, clicks generate, and reviews the output. She likes the spread and clicks “Copy.”
- She opens a blank Google Sheet and pastes the list. It lands in one column. She quickly moves each group into its own adjacent column so she can see all groups at a glance.
- In Classroom, she creates a new assignment titled “Density Lab – Groups 1‑7.” She picks “Group of students,” searches and selects the students from Group 1, names the group “Table 1,” and saves.
- She duplicates the assignment six times, editing each copy to pick a different group with the correct group name.
- She publishes all seven assignments. Students see only their own assignment when they log in.
Ms. Rivera used to spend 15‑20 minutes handwriting groups and then recreating them in Classroom. Now she’s done before her coffee gets cold.
Limitations and Workarounds
Google Classroom does not yet support importing a bulk group list from a spreadsheet or text file. That means you can’t directly “export random groups” as a Classroom‑ready file that automatically creates the groups. However, the copy‑and‑search workflow described here is the fastest alternative available.
A few things to keep in mind:
- Groups are assignment‑specific. The groups you create in one assignment won’t automatically appear in another. If you reuse groups often, keep your exported list in a Google Sheet and use it as a reference each time.
- Roster changes require new groups. If a student joins or leaves, regenerate the list with the updated roster to keep groups balanced.
- Large classes may benefit from CSV export. For classes above 30, downloading the CSV and using it in a separate monitor or tablet can speed up selection.
If you’re looking for other ways to integrate group creation into your workflow, the Random Pair Generator is useful for pairing activities, and the Random Student Picker is perfect for calling on individuals during whole‑class discussions.
FAQ
Can I directly sync random groups to Google Classroom?
No, there isn’t a direct sync or import feature. The Random Group Generator provides export options like copy‑to‑clipboard and CSV download. You then use those exported lists to manually select students in Classroom’s “Group of students” assignment option.
How do I save groups to reuse later in Google Classroom?
The groups you define in an assignment are tied to that single post and cannot be saved as a reusable set. To reuse groups, keep a master list of your generated groups in a Google Sheet and reference it whenever you create a new group‑based assignment.
What if my student list changes after I’ve exported groups?
If your class roster changes, go back to the Random Group Generator and paste in the updated list. Generate fresh groups, then use the new exported list for your next assignments. This ensures groups stay fair in size.
Does the random group generator work with Google Classroom rosters?
Yes. You can copy student names directly from Classroom’s “People” tab and paste them into the generator. The tool will randomize and group them instantly.
Can I export groups as a CSV for other platforms?
The generator’s CSV download works anywhere that accepts spreadsheet files. While Google Classroom can’t import groups from a CSV, you can use the same file to set up groups in platforms like Zoom’s breakout rooms or Microsoft Teams.
Ready to stop sorting groups by hand? Head over to the Random Group Generator and create your first set of groups in seconds. Once you’ve got your list, follow the steps above to roll them right into your next Google Classroom assignment.
Sources
- Google Classroom Help — official documentation for sharing materials with classes
SponsoredExplore more resources