
random group generator
Random Group Generator Google Classroom Integration: How to Create Fair Groups Fast
Learn how to use a free random group generator with Google Classroom to quickly create balanced student teams, pairs, or randomly pick a participant. Step-by-step tutorial for K‑12, higher‑ed, and corporate trainers.
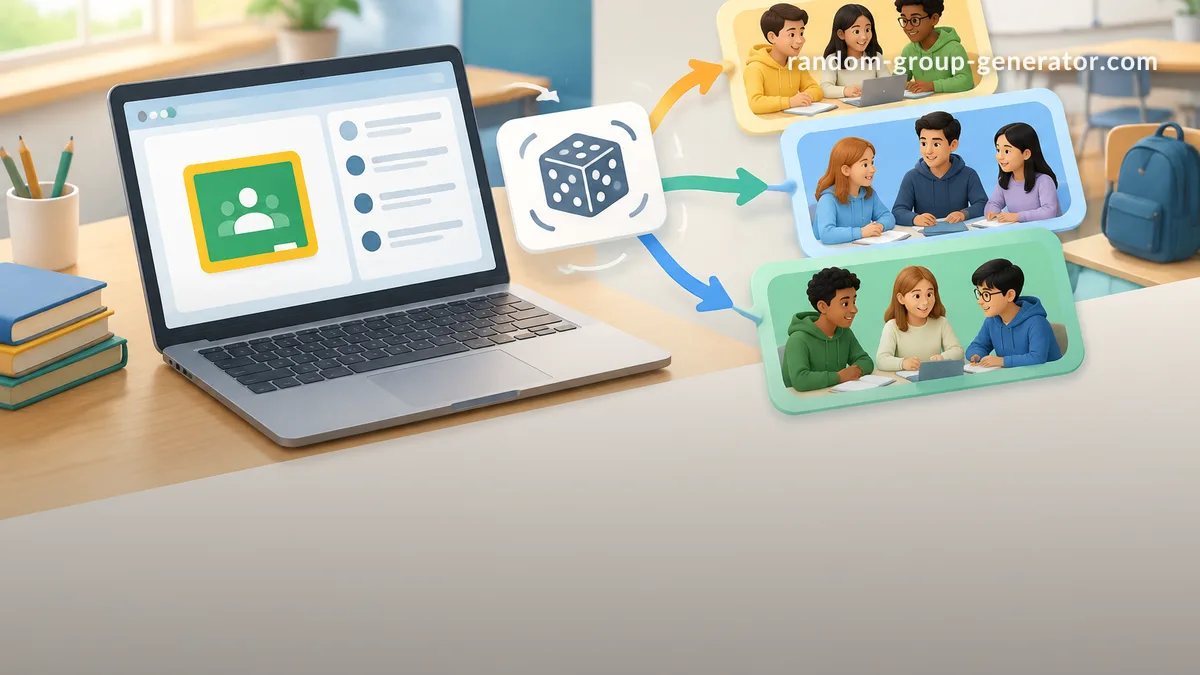
You have a Google Classroom full of students and a project that requires quick, unbiased groups. If you’ve ever spent ten minutes trying to manually split a roster into equal teams while avoiding best‑friend clusters, you know the frustration. A free random group generator with a simple Google Classroom integration can take your student list and turn it into balanced groups in seconds—no clipboard chaos required. This guide walks you through the exact steps, from exporting your Classroom roster to posting the final groups back into your stream.
Why Random Grouping Matters in Google Classroom
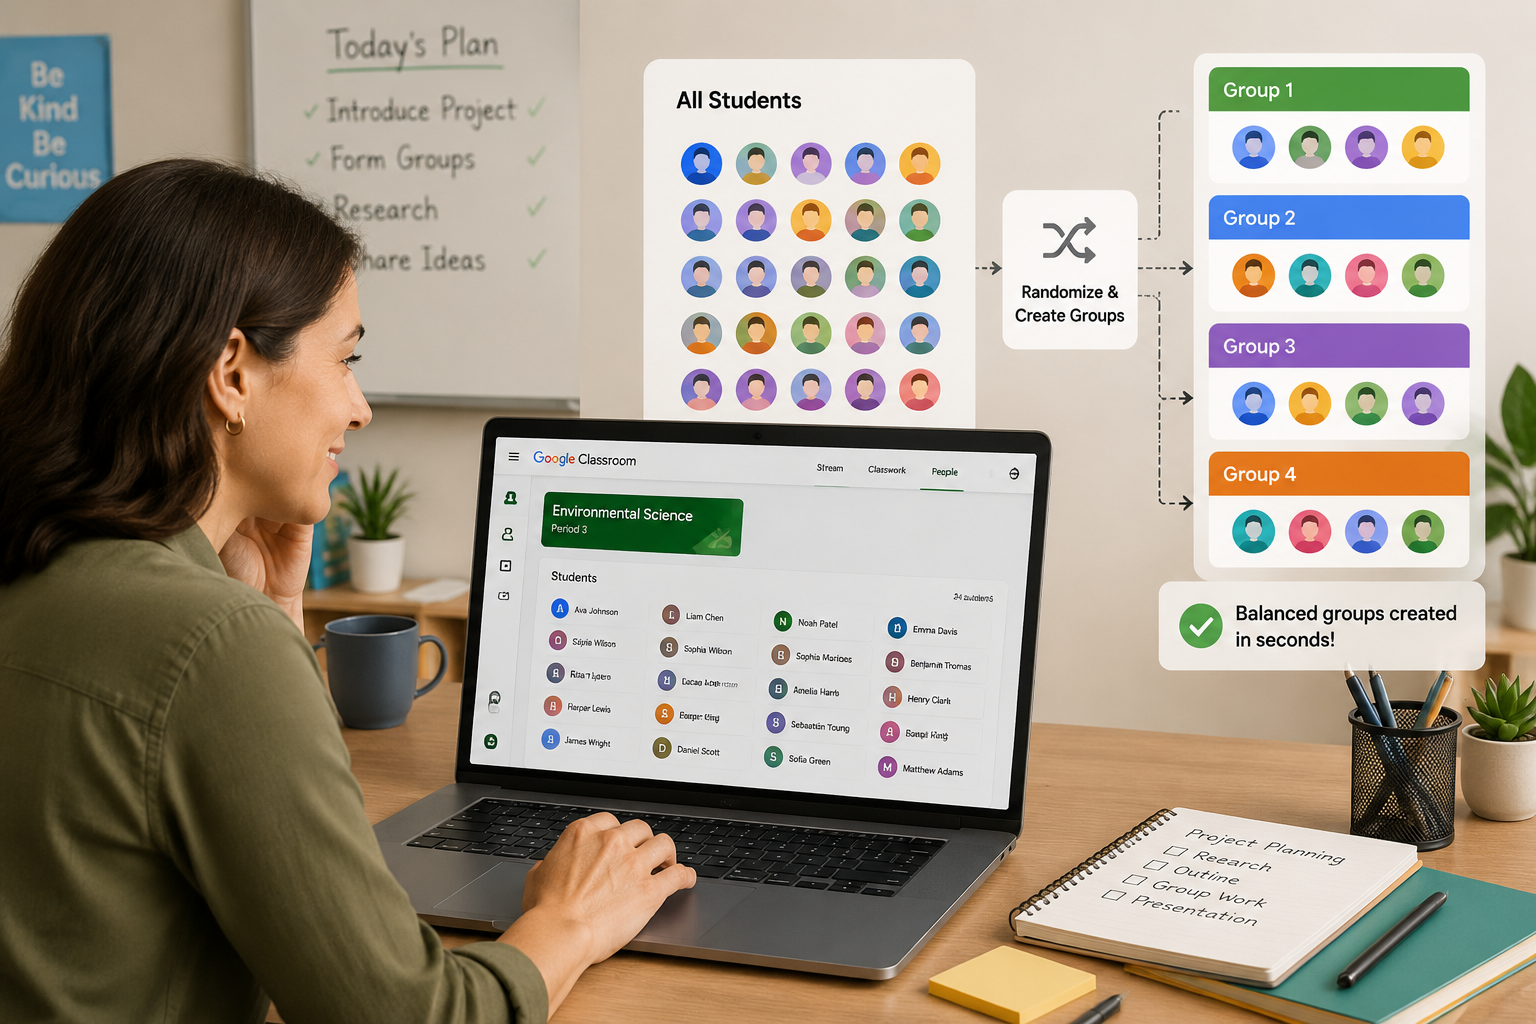
Teachers and trainers who use Google Classroom often rely on grouping for project‑based learning, breakout discussions, and station rotations. Manual grouping suffers from two common problems: it’s slow, and it’s subject to unconscious bias. A random approach removes the guesswork, giving every student an equal chance to work with different peers. Research on cooperative learning consistently shows that heterogeneous, random teams improve engagement and reduce social cliques, especially in middle‑grade and high‑school settings.
Google Classroom itself does not have a built‑in random group generator. You can create “groups” only through the original Courses feature that tied to legacy Groups, or by labor‑intensively copying names into a separate document. What teachers need is a bridge: a tool that accepts a list of names from Classroom and outputs ready‑to‑use team rosters. The free web app at random‑group‑generator.com fills that gap. With zero sign‑up, you paste your exported roster, set the number of students per group (or number of groups), and generate evenly distributed teams.
The integration described here is not an official API plugin; it’s a practical workflow that thousands of educators use daily. Because Google Classroom lets you export a simple CSV of student names, you can copy‑paste that data into any third‑party tool. The whole process takes less than a minute once you’ve done it once.
How to Get Your Google Classroom Student List into the Random Group Generator
Before you can generate groups, you need your roster in a plain‑text format. Google Classroom provides a clean way to get student names without email addresses or other personal data.
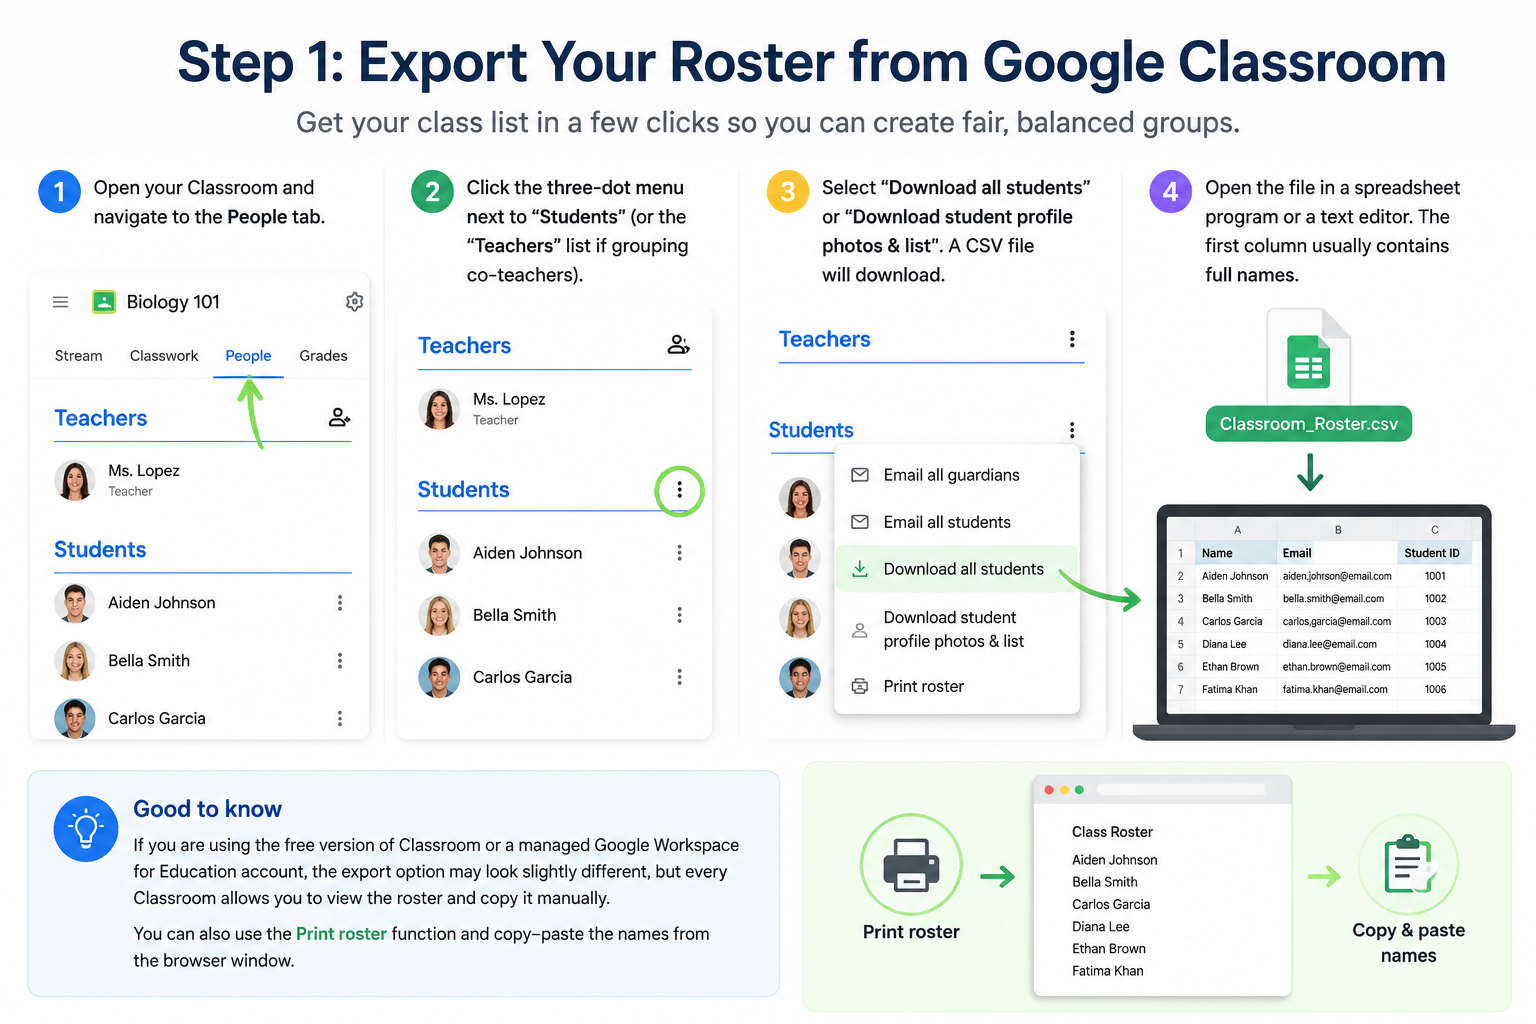
Step 1: Export Your Roster from Google Classroom
- Open your Classroom and navigate to the People tab.
- Click the three‑dot menu next to the “Students” heading (or the “Teachers” list if you are grouping co‑teachers).
- Select “Download all students” or “Download student profile photos & list”. A CSV file will download.
- Open the file in a spreadsheet program or a simple text editor. The first column usually contains full names.
If you are using the free version of Classroom or a managed Google Workspace for Education account, the export option may look slightly different, but every Classroom allows you to view the roster and copy it manually. You can also use the Print roster function and copy‑paste the names from the browser window.
Step 2: Paste the Names into the Generator
- Go to https://random-group-generator.com/tools/random-group.
- In the large text area, clear any sample names and paste your list. Each name must be on its own line.
- Double‑check that no extra commas or spaces appear—just one name per line.
That’s it. Your Google Classroom roster is now inside the random group generator. No accounts, no student data stored on servers, and no privacy worries. All processing happens locally in your browser.
Configuring Your Random Groups: Sizes, Names, and Settings
With your student names loaded, you decide how the groups will be formed. The default setting splits the list into equal‑size groups, filling any remainder across the last few teams.
Choosing the Right Group Size
Enter the number of students you want in each group, or select the total number of groups. For a class of 28, if you want four cooperative learning teams, set “Number of groups” to 4. The generator will automatically create three groups of 7 and one group of 7—perfectly balanced. If you prefer to work the other way, set “Students per group” to 3 and the tool will tell you there will be 9 groups of 3 with 1 leftover student.
Deciding on group size is a pedagogical choice, not a technical one. For think‑pair‑share activities, groups of 2 work best—use the Random Pair Generator directly. For lab teams, groups of 3–4 are typical. The generator never complains if you give it an uneven number; it always creates the most equitable distribution possible.
Using Team Names That Make Sense in Classroom
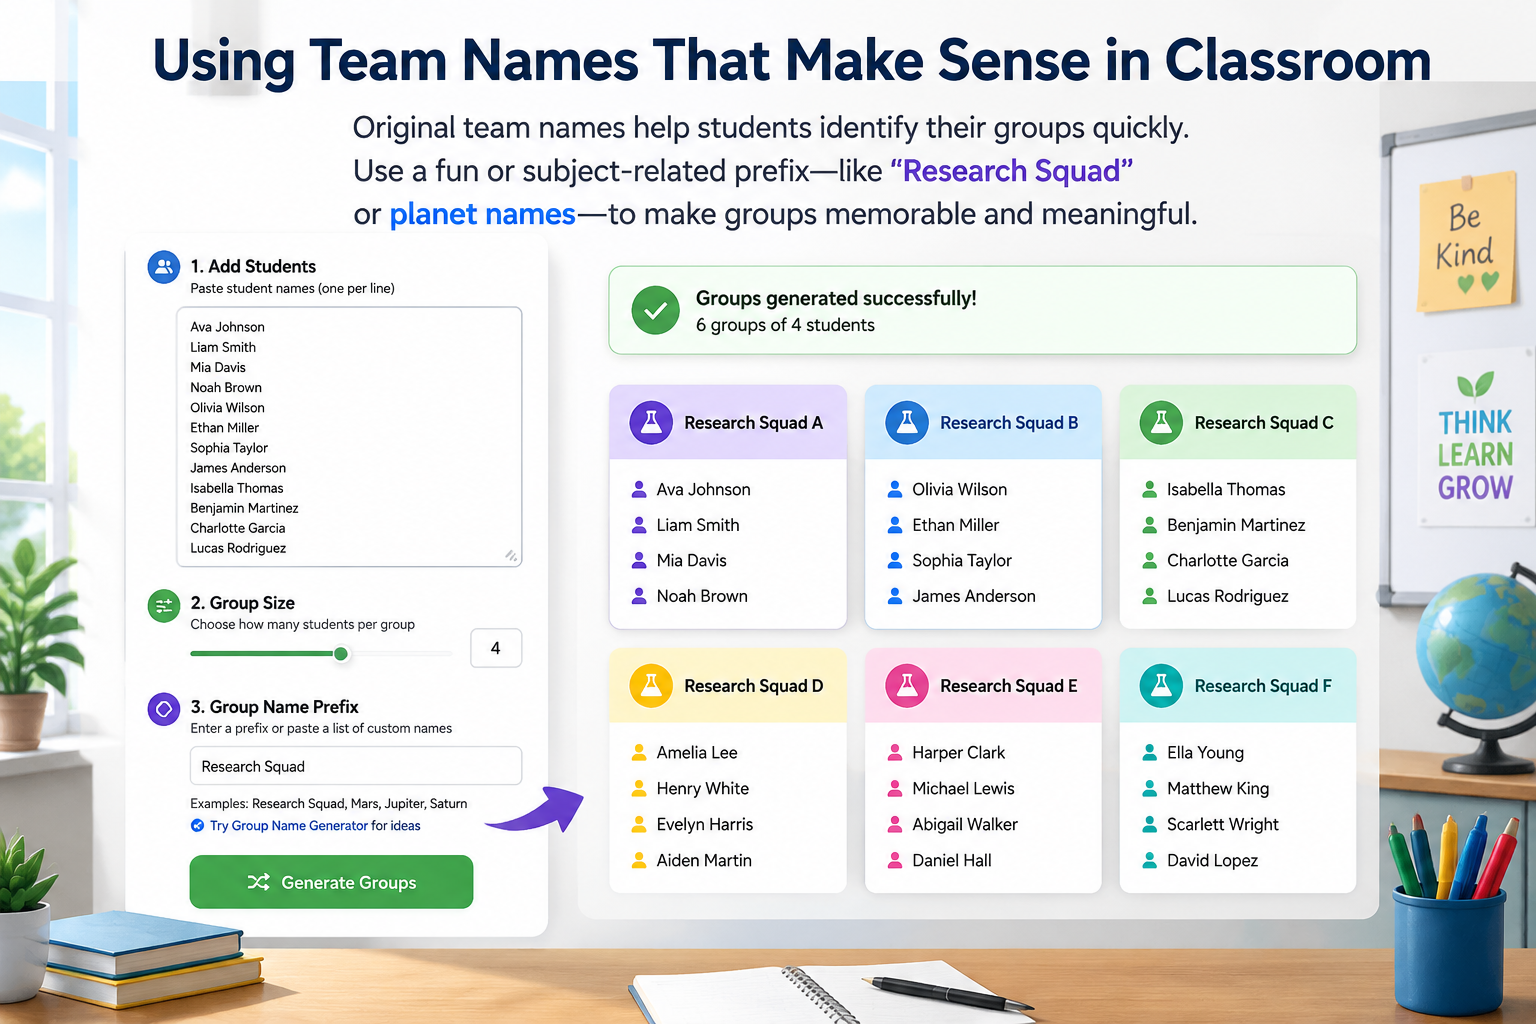
Original team names can help students identify their groups quickly. Instead of “Group 1”, “Group 2”, switch the optional “Group name” prefix to something fun or subject‑related—like “Research Squad A”, “Research Squad B”, or even “Mars”, “Jupiter”, “Saturn” for a space unit. The tool lets you enter any prefix, and it automatically appends a unique identifier. For a complete random set of creative names, try the Group Name Generator first, then copy your favorite list and paste it as a custom prefix list.
Once you’ve configured the settings, hit “Generate groups”. Your screen fills with clearly divided boxes, each labeled with the group name and containing the student names.
Assigning the Generated Groups Back to Google Classroom
The most practical step: getting those teams visible to your students. Since the random group generator does not write directly into Google Classroom, you have several reliable ways to share the results.
Method 1: Post the Group List as an Announcement or Material
Copy the output from the generator (there’s a one‑click “Copy results” button) and paste it into a new post on the Classroom Stream. To keep formatting, use a new Announcement or Material with the group list. You can add brief instructions: “Please sit with your assigned group when we start the lab.” Students will see the list in the stream, and they can reference it later.
Pro tip: If your list is long, use the “Copy results as text with tabs” option and paste it into a Google Doc. Share the doc as a “View only” file in the Classroom assignment or material. This prevents students from accidentally editing names.
Method 2: Create a Google Doc Automatically
Some teachers prefer to group students inside a collaborative document. Here’s a quick workflow:
- Generate groups on the tool.
- Click “Copy results as table”.
- Open a new Google Doc in Classroom and paste. The table retains clear rows and columns.
- Share the Doc with editing rights if you want students to add project details next to their names.
This is especially useful for project‑based assignments where each group maintains a shared workspace.
Method 3: Use for Breakout‑Room Preparation
If you are using Google Meet built into Classroom, you can manually create breakout rooms using the group list. Assign students to breakout rooms based on the generated teams. While this is manual, having the list ready reduces setup time from minutes to seconds.
Advanced Integration Workflows: Pairs, Student Picker, and Team Naming
Once you’re comfortable with the basic random group flow, you can combine multiple free tools to handle different classroom moments without leaving your routine.
Quick Random Checks with the Student Picker
Sometimes you only need to choose one student to answer a question, present first, or lead a discussion. The Random Student Picker works seamlessly with the same roster. Paste your Google Classroom list once, then click a button to pick a name at random. It visually spins through the options, adding an element of gamified suspense. After the pick, you can remove that student and continue selecting for further rounds.
This is ideal for formative assessment during Google Classroom‑based lessons: ask a question, use the picker to select a student to unmute and answer, then move on. No biased hand‑raising or awkward silences.
Pair Generation for Think‑Pair‑Share and Peer Review
The Random Pair Generator creates two‑person teams from your roster. In Google Classroom, team‑based peer review activities often require paired reviews. Instead of letting students choose their own partners—which can quickly devolve into off‑task chatting—paste your list into the pair generator and share the resulting list via a Classroom Material post. The pairing is random, fair, and instant.
For larger classes where you want both groups and pairs on the same day, keep the same imported names in the generator tab. You can switch between the three tools using the same dataset because the web application caches your input locally. No need to re‑paste each time.
Real‑World Classroom Scenarios
Here are concrete examples of how a Google Classroom + random group generator workflow solves everyday teaching challenges.
Middle‑school science lab: Ms. Chen has 32 students enrolled in her Google Classroom for 8th‑grade science. Every Monday she needs 8 lab groups of 4. She exports the roster from the People tab, pastes it into the Random Group Generator, sets “Students per group” to 4, and generates. She copies the table, opens a new Material in Classroom, and pastes it. The entire process takes under two minutes.
Corporate onboarding breakout: A trainer uses Classroom to deliver compliance training to a cohort of 19 new hires. To run a breakout discussion, she needs 5 small groups. Using the same tool, she sets “Number of groups” to 5 and gets groups of 4‑4‑4‑4‑3. She then schedules breakout rooms manually in Google Meet based on the list.
University literature seminars: A professor uses the random student picker to call on students during a live Classroom Meet session. She imported the name list once at the beginning of term. During each discussion, she opens the picker tab and clicks to select a random student to respond. The visual spinning display keeps students attentive.
FAQ
Does the random group generator work directly inside Google Classroom?
No. The generator is a web‑based tool that runs in your browser. However, you can import your Google Classroom student list by exporting it as a CSV and pasting the names. The results are easily shared back to Classroom via posts, documents, or materials. This manual workflow is fast and does not require any third‑party permissions.
Is my student data safe when I paste names into the tool?
Yes. The random group generator processes all data in your browser only. No names are uploaded, stored, or shared with any server. Once you close the tab, the list disappears. This aligns with typical FERPA and GDPR considerations, but always check your institution’s policies.
Can I save my Google Classroom roster inside the tool for repeated use?
The tool does not save data across sessions. For repeated use, keep your exported CSV file handy, or bookmark a Google Doc containing your class list. You can also use browser local storage features, but the simplest method is to re‑paste the list each time—it takes only a few seconds.
What if I have multiple Google Classrooms with different students?
You can paste a combined list or generate groups per classroom separately. The tool allows you to paste as many names as you need. For cross‑classroom group projects, combine the rosters from multiple Classrooms into one text file, then paste and generate.
How do I handle odd numbers of students and avoid singled‑out leftovers?
The generator automatically distributes the leftover students across the groups so that no group has more than one extra member. For example, 27 students split into 5 groups yields three groups of 5 and two groups of 6. If you absolutely must avoid any imbalance, you can manually swap a few names after generation—but the algorithm already produces the most equitable split.
Ready to Create Fair Groups in Google Classroom?
Stop randomly picking students from your memory or sticky notes. Use the free, privacy‑friendly random group generator to turn your Google Classroom roster into balanced teams, pairs, or random selections in seconds. No sign‑up, no downloads, and no student data stored anywhere.
Open the Random Group Generator and paste your first list now.
Sources
- Google Classroom Help — official documentation for sharing materials with classes
Related Tools
Pick the right generator for the job — every tool runs free in your browser.