
advanced random group settings
Advanced Random Group Settings: Custom Group Sizes and Constraints
Learn how to plan advanced random group settings, balance custom group sizes, manage participant constraints, and create fair groups for classrooms and teams.

Creating random groups sounds simple until the numbers stop dividing evenly or certain participants need to work together. A teacher with 27 students, for example, might need groups of different sizes while ensuring that particular students are not placed together. A corporate facilitator may need teams with a mix of experience levels and complementary skills. Advanced random group settings help you plan these situations by combining group-size decisions, participant requirements, and fair assignment practices. This guide explains how to approach more complex group formation without making the process unnecessarily complicated.
1. Why Advanced Random Group Settings Matter
Basic random grouping works well when everyone can be assigned without additional requirements. You enter a participant list, choose a group arrangement, and distribute people randomly. However, real classroom and workplace situations often involve more complicated decisions. You may have an odd number of participants, a limited number of workstations, students who need additional support, or employees who bring different skills to a project.
Advanced random group settings provide a planning framework for handling these situations. Instead of focusing only on random selection, you consider the conditions that make an assignment useful. These conditions might include a maximum group size, a required number of groups, a preferred mix of experience levels, or specific separation requirements. Randomness remains part of the process, but it operates within a clearly defined plan.
For educators, this matters because group composition can influence participation and classroom management. The University of Minnesota's cooperative learning guidance emphasizes that simply seating students together does not automatically create effective collaboration. Teachers also need to consider participation, shared responsibilities, and the structure of the task. For workplace facilitators, similar planning helps ensure that teams have enough people and appropriate expertise to complete their work.
Consider a teacher with 26 students who wants five working groups. Dividing the class equally is impossible because 26 does not divide evenly by five. A practical solution is to create one group of six and four groups of five. The important decision is not whether every group has exactly the same number of members, but whether the arrangement is reasonable for the activity.
2. Choose Custom Group Sizes Before Assigning Participants
Group size should reflect the activity rather than convenience alone. A short discussion may work well with pairs, while a research project requiring several responsibilities may need larger teams. Choosing group sizes first prevents the assignment process from producing arrangements that are difficult to manage.
Educational guidance offers useful starting points, although no single size is ideal for every situation. The University of Minnesota's TIES cooperative learning guide discusses small groups of approximately two to four students. The London School of Economics evidence-based teaching guide also discusses the benefits of smaller teams, particularly groups of three to five. These are practical reference points, not universal rules. A complex project may justify a larger group when the work genuinely requires more people.
Use this process when deciding on custom group sizes:
- Count the total number of participants.
- Identify the number of groups you want or the preferred number of people per group.
- Consider the responsibilities required by the activity.
- Calculate whether equal groups are possible.
- Decide how to distribute any remaining participants.
- Check whether the resulting sizes are manageable for the available time and resources.
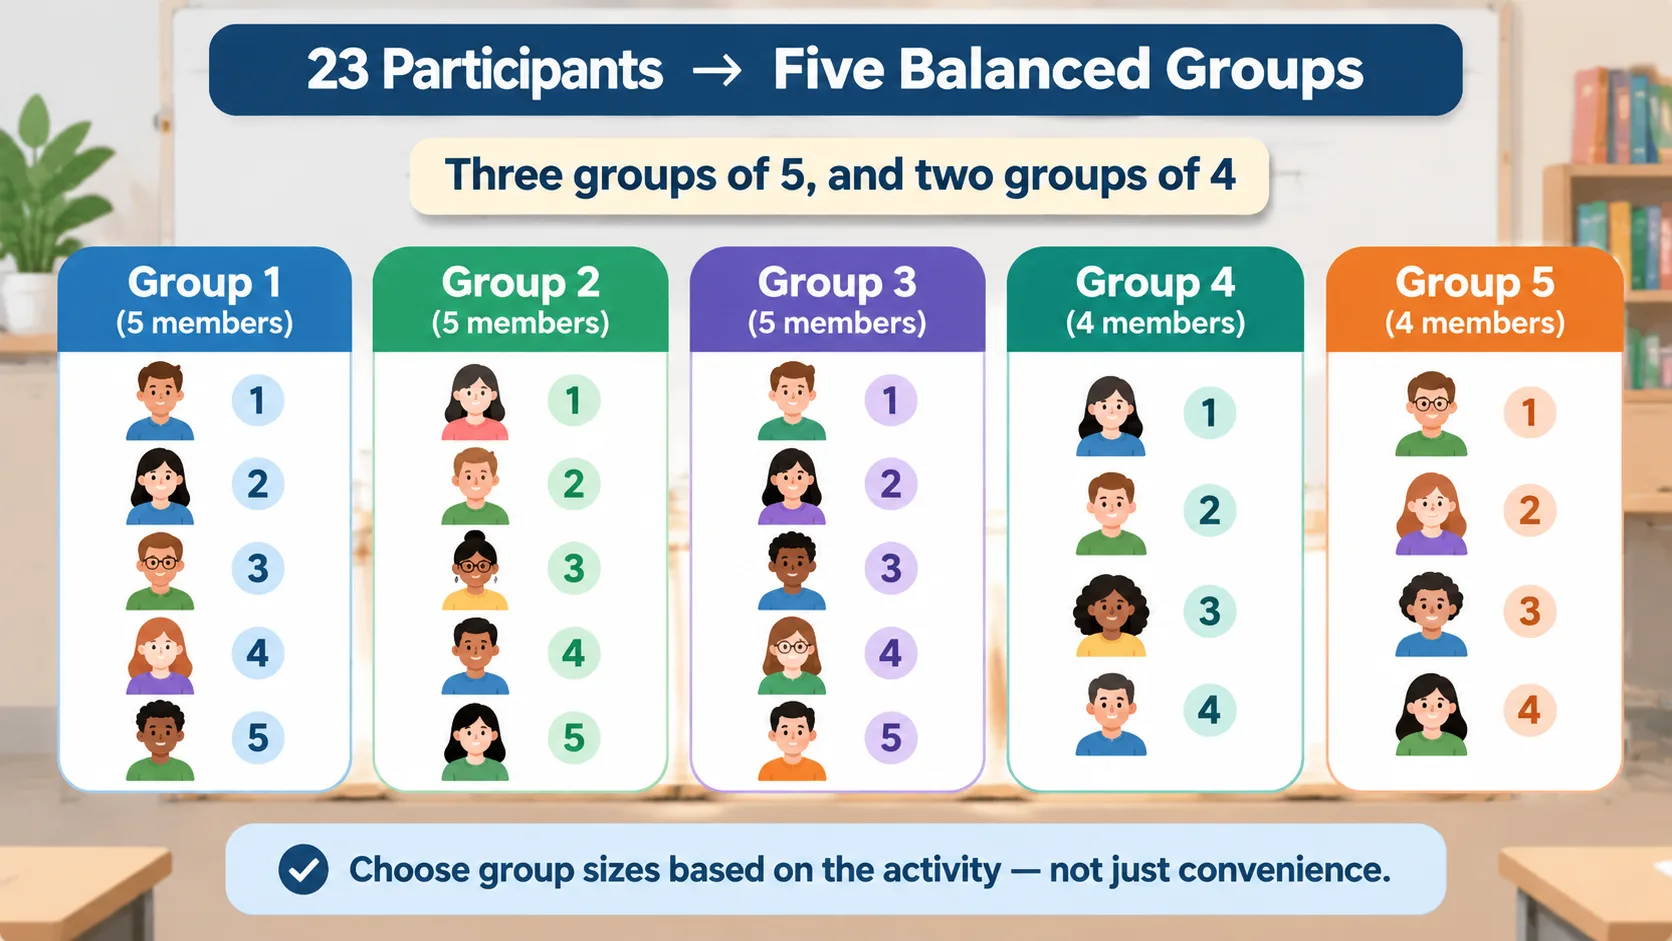
For example, imagine a workshop with 23 participants. The facilitator wants five teams. An arrangement of three teams with five people and two teams with four people accounts for everyone. If the activity involves five distinct roles, the facilitator might prefer groups of four or five rather than pairs. If the task is a quick brainstorming exercise, smaller teams may allow more people to contribute directly.
You can use the Random Group Generator as the starting point for distributing participants. Decide on the target group arrangement before generating assignments, then check the resulting group sizes against your activity requirements. If the available controls do not express a particular requirement, use a separate planning step rather than assuming the tool automatically enforces it.
3. Handle Participant Constraints Without Losing Fairness
Participant constraints are conditions that affect who can or should be assigned together. They can be operational, educational, or logistical. Examples include keeping project partners together, separating participants who have already worked together, accommodating accessibility needs, or ensuring that each team has access to a required skill.
The first step is to distinguish between essential constraints and preferences. An essential constraint must be respected for the activity to work. A preference is something you would like to achieve but can adjust if the participant count makes it impractical. Treating every preference as mandatory can make group formation unnecessarily difficult.
A useful planning method is to write down each requirement before assigning anyone:
- List requirements that cannot be changed.
- Identify preferences that can be adjusted.
- Check whether two requirements conflict.
- Decide which requirement takes priority if a conflict occurs.
- Create the groups and review every assignment against the list.
For example, a teacher organizing a science activity may want every group to have access to a student familiar with a particular piece of equipment. The teacher also wants students to meet classmates outside their usual friendship circles. Equipment familiarity is an important task requirement, while the friendship preference can be treated as a secondary consideration. The teacher can distribute the relevant experience across groups and then randomize the remaining assignments as far as practical.
It is important to remember that random assignment and constraint satisfaction are not identical. A completely unrestricted random draw does not guarantee that every special requirement will be met. If a tool does not offer a dedicated restriction or balancing control, review the output manually and make transparent adjustments. This is more reliable than describing an unrestricted random result as fully constraint-based.
4. Balance Skills and Experience Across Groups
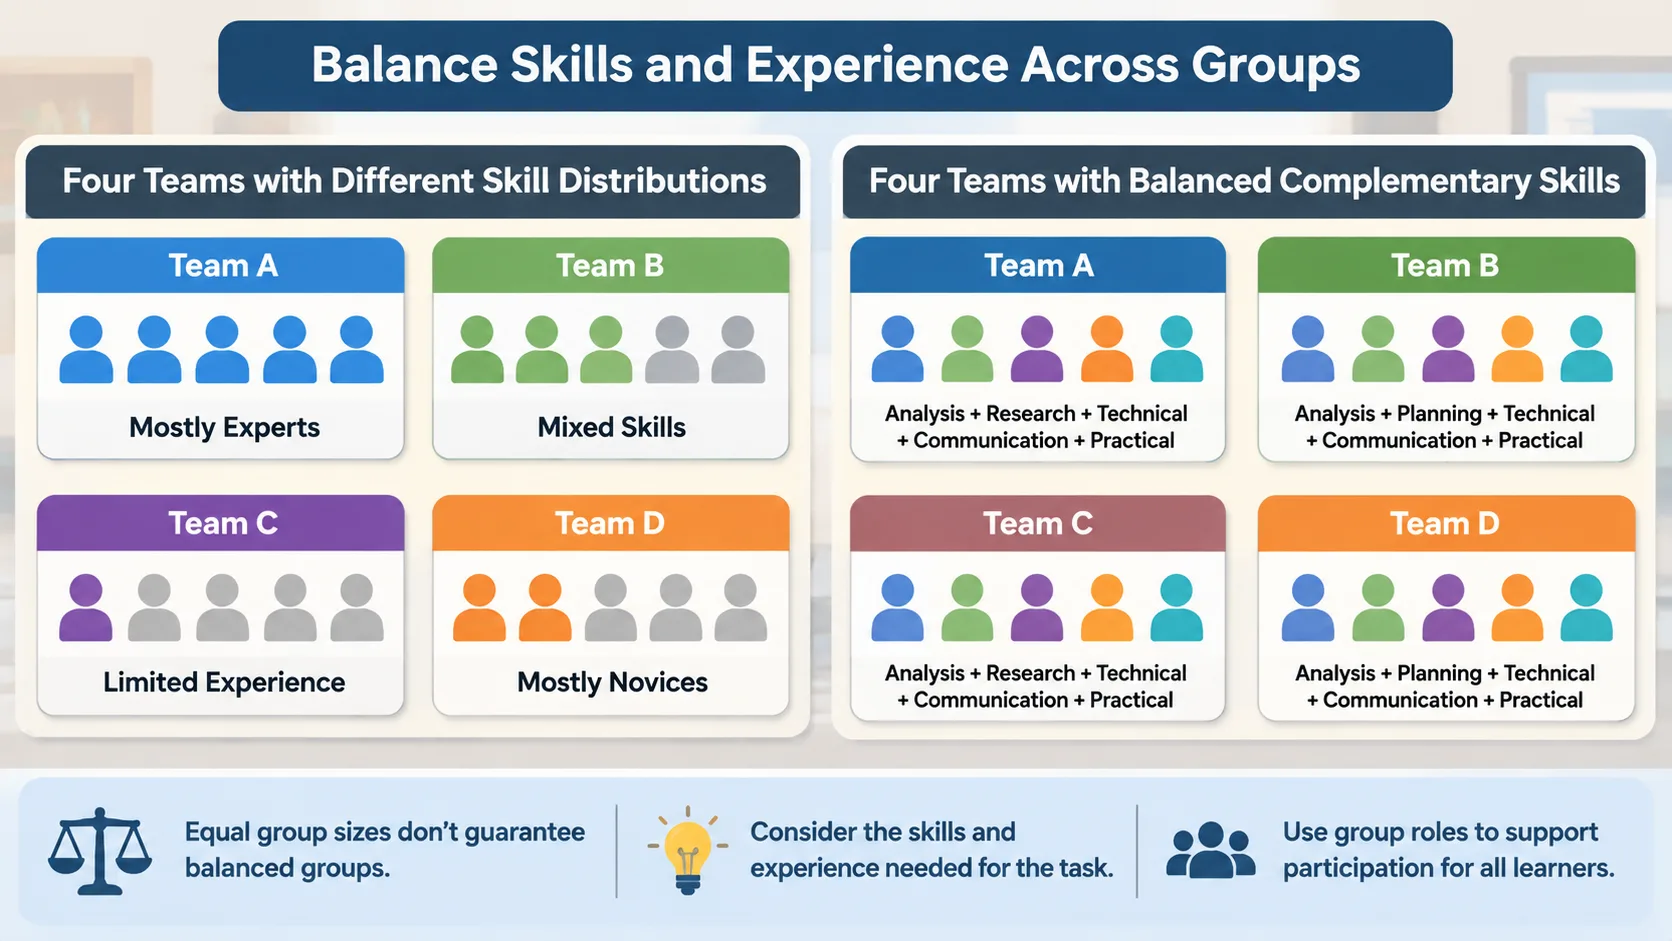
Equal group sizes do not necessarily produce balanced groups. Five teams containing five people each may still differ significantly in experience, subject knowledge, or practical skills. When the assignment involves problem-solving or project work, consider the capabilities each team needs.
The University of Minnesota Center for Educational Innovation recommends considering group composition and the requirements of the activity. It also discusses group roles as a way to support participation, while noting that assigned roles should not create barriers for students with disabilities. This is a useful reminder that balancing groups involves more than distributing labels or scores.
A simple approach is to identify a few relevant characteristics. For a classroom activity, these might include familiarity with the subject, confidence with the task, and experience collaborating. For a workplace project, they might include technical knowledge, communication, customer experience, and project coordination. Avoid collecting personal information that is not necessary for the assignment.
For example, suppose a training session has 20 employees divided into four teams. Each team needs someone familiar with the new software, someone who understands the existing workflow, and people who can test the proposed process. The facilitator can first distribute participants with those skills across the teams, then randomly assign the remaining participants.
This approach creates a useful distinction between balanced composition and identical composition. Teams do not need exactly the same personalities or backgrounds. They need a reasonable mix of the characteristics that matter for the task. The aim is to give each group a workable combination of resources without treating individual characteristics as fixed measures of ability.
5. Use Repeatable Randomization for Fair Group Rotation
Random grouping is especially useful when participants work with different people across multiple lessons, training sessions, or events. Repeatedly using the same groups can limit opportunities for collaboration. However, simply generating new groups each time does not guarantee that participants will meet a wide range of people.
A more deliberate rotation process combines random assignment with a simple record of previous groups. After each activity, note which participants worked together. Before the next session, review those combinations and decide whether avoiding recent pairings is important. If the tool does not automatically track previous assignments, keep a separate record and apply any necessary adjustments manually.
For example, a teacher has 24 students and wants six groups of four for four consecutive project sessions. The teacher can generate new groups for each session, record the previous combinations, and check whether the same students repeatedly end up together. If two students have worked together several times, the teacher can adjust the next arrangement to encourage new collaboration.
A useful workflow is:
- Maintain an up-to-date participant list.
- Decide the group sizes for the next activity.
- Generate a new random arrangement.
- Compare the result with previous assignments.
- Adjust repeated combinations when necessary.
- Save the final arrangement for reference.
This method is particularly helpful for recurring workshops and classroom activities. It also provides a clear explanation when participants ask how groups were formed. Remember that avoiding repeated pairings introduces an additional condition, so the final result may no longer be a completely unrestricted random assignment.
6. Common Mistakes When Using Advanced Group Settings
Even a carefully planned assignment can create problems if the requirements are unrealistic. One common mistake is making every group-size preference mandatory. For instance, a facilitator with 22 participants might insist on five groups of exactly four people. Two participants would have no place in the arrangement. A better approach is to adjust the number of groups or allow one or more groups to contain an additional participant.
Another mistake is adding too many constraints. A teacher might try to balance experience, friendships, previous partnerships, preferred seating, and several individual requirements at the same time. Some conditions may conflict. Start with the requirements that directly affect the task, then introduce additional preferences only when the participant list allows them.
A third mistake is assuming that randomization automatically produces educationally appropriate groups. Random assignment can reduce the influence of personal preference, but it does not independently account for accessibility, interpersonal needs, specialist knowledge, or classroom dynamics. These decisions still require professional judgment.
Finally, avoid making groups larger simply to reduce the total number of teams. Larger groups can introduce additional coordination demands and make it harder for everyone to participate. The University of Minnesota's cooperative learning guidance emphasizes meaningful participation and appropriate group structure. When a task requires many people, consider dividing the work into smaller subgroups with clear responsibilities.
For example, a 30-person workshop may need six project teams, but a short discussion does not necessarily require five people in every team. Depending on the activity, smaller groups followed by a whole-room discussion may be easier to facilitate. The best arrangement is the one that fits the actual work.
7. A Practical Workflow for Advanced Random Group Settings
The most reliable way to manage complex assignments is to use the same planning sequence every time. This reduces last-minute changes and makes group formation easier to explain. It also helps teachers and facilitators distinguish between decisions made before randomization and adjustments made afterward.
Here is a complete example for a teacher organizing 29 students into six groups for a collaborative research activity.
Step 1: Define the activity. Each team must research a topic, prepare a short presentation, and share the speaking responsibilities. Teams need enough members to divide the work without making coordination difficult.
Step 2: Choose group sizes. Six groups cannot contain exactly the same number of students. A practical arrangement is five groups of five and one group of four. All 29 students are accounted for.
Step 3: Identify essential requirements. The teacher determines whether any students need particular accessibility arrangements or whether specific equipment must be available to each team. Only requirements relevant to successful participation are included.
Step 4: Identify balancing preferences. The teacher considers relevant experience and subject familiarity. These characteristics are distributed across teams where practical, without treating students as permanent ability categories.
Step 5: Generate the assignments. Use the Random Group Generator to organize the participant list. If a particular constraint cannot be configured directly, apply it during the planning and review process.
Step 6: Review the result. Check that every student appears once, the group sizes are correct, and essential requirements are satisfied. Look for accidental omissions or duplicate assignments.
Step 7: Explain the arrangement. Tell students that the groups were formed using a random starting process with necessary practical adjustments. Explain the task and distribute responsibilities so that every student has a meaningful way to participate.
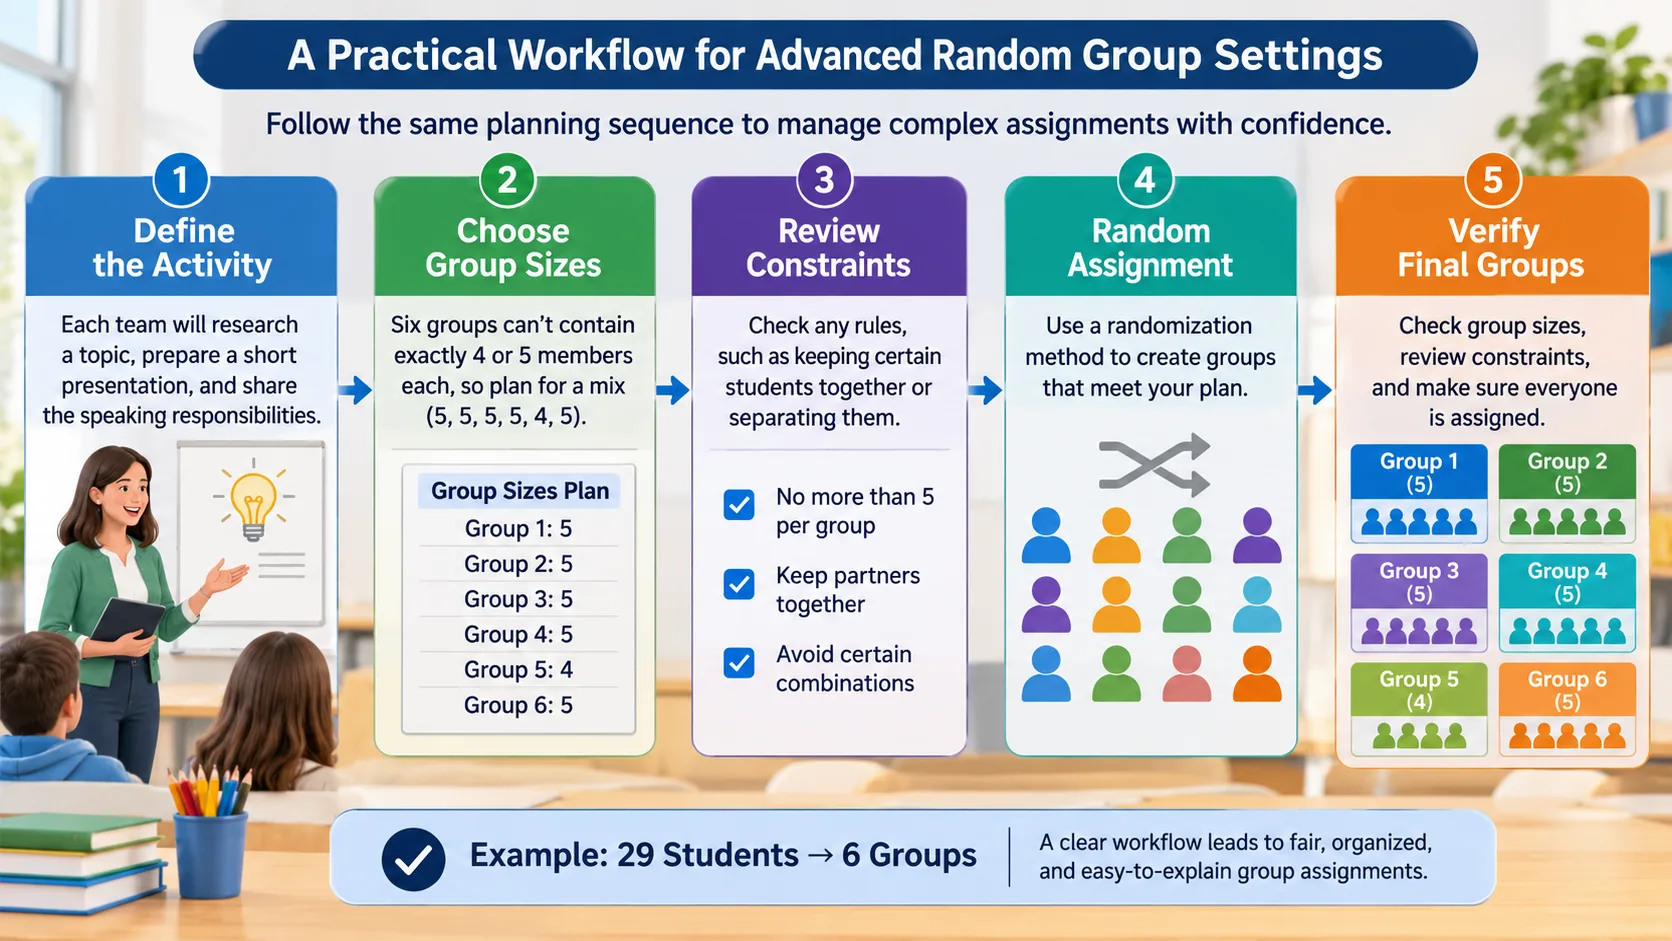
This process works for corporate training and event facilitation too. A workshop leader can replace student experience with job-related skills, replace classroom equipment with project resources, and use the same sequence to organize teams. The important principle is consistency: define the requirements first, generate assignments second, and verify the final arrangement before sharing it.
8. When to Use a Random Group Generator or Manual Assignment
A random group generator is useful when you need to distribute a participant list quickly and want a neutral starting point. It can reduce the time spent manually assigning names, particularly when you regularly organize classroom activities, workshops, or team exercises.
Manual assignment is more appropriate when the situation requires detailed knowledge of participants or sensitive accommodations. For example, a teacher may need to consider individual learning plans or classroom support arrangements that should not be handled through an unrestricted random draw. A project manager may also need to assemble a specialist team around highly specific responsibilities.
A combined method often makes the most sense. Use random assignment for the parts of the process that can reasonably be randomized, then review the result against documented requirements. This keeps the process efficient without pretending that every group needs to be determined by chance alone.
If your activity involves pairs rather than larger teams, the Random Pair Generator offers a more suitable starting point. For a classroom activity where you need to select one participant rather than form several teams, the Random Student Picker serves a different purpose. Choosing the right tool for the task helps avoid unnecessary adjustments.
Frequently Asked Questions
What are advanced random group settings?
Advanced random group settings are planning options and assignment rules used when basic random grouping is not enough. They can involve custom group sizes, participant requirements, skill balancing, and limits on particular combinations. Some requirements may need to be reviewed or applied manually if the chosen tool does not provide a dedicated control.
How do I divide an uneven number of students into equal-sized groups?
You cannot always create perfectly equal groups when the participant count does not divide evenly by the number of groups. Instead, distribute the remaining students across selected groups so that their sizes differ by no more than one whenever practical. For example, 23 students divided into five groups can produce three groups of five and two groups of four.
Can random groups account for students who should not work together?
That depends on the features available in the grouping tool. An unrestricted random generator does not automatically know which participants should be separated. You can identify essential restrictions before generating groups and review the assignments afterward, making appropriate adjustments where necessary.
What is the best group size for classroom activities?
There is no universal best size. Pairs are useful for short discussions and reciprocal practice, while groups of three or four can provide more perspectives without making coordination too difficult. Larger groups may be appropriate for complex projects that genuinely require more responsibilities or expertise.
How can I make random groups more balanced?
Identify the skills or experience that matter for the activity before assigning participants. Distribute those characteristics across groups where practical, then randomize the remaining participants. Review the result for group size, participation opportunities, and essential requirements rather than assuming that equal numbers guarantee balanced teams.
Are random groups always fairer than teacher-selected groups?
Random grouping can provide a consistent starting point and reduce the influence of personal preferences. However, it does not automatically account for accessibility, learning needs, specialist skills, or previous group experiences. A transparent process that combines randomization with appropriate professional judgment may be more suitable for activities with additional requirements.
Create Better Groups With a Clearer Plan
Custom group sizes and participant constraints do not have to make group formation complicated. Start with the activity, calculate workable group sizes, identify essential requirements, and use random assignment wherever it makes sense. Then review the result before sharing it with participants.
Whether you are organizing a classroom discussion, a training workshop, or a workplace project, a consistent process makes group formation easier to manage and explain. Try the Random Group Generator to organize your participant list and create your next set of groups. Use the result as a practical starting point, and make any necessary adjustments to meet the needs of your activity.
Related Tools
Pick the right generator for the job — every tool runs free in your browser.