
zoom breakout rooms
Zoom Breakout: Complete Guide for Microsoft Teams Integration
Learn how to use the Random Group Generator as your Zoom Breakout and integrate with Microsoft Teams. Create balanced breakout groups fast for education, training, and events.
Zoom Breakout房間生成器: Complete Guide for Microsoft Teams Integration
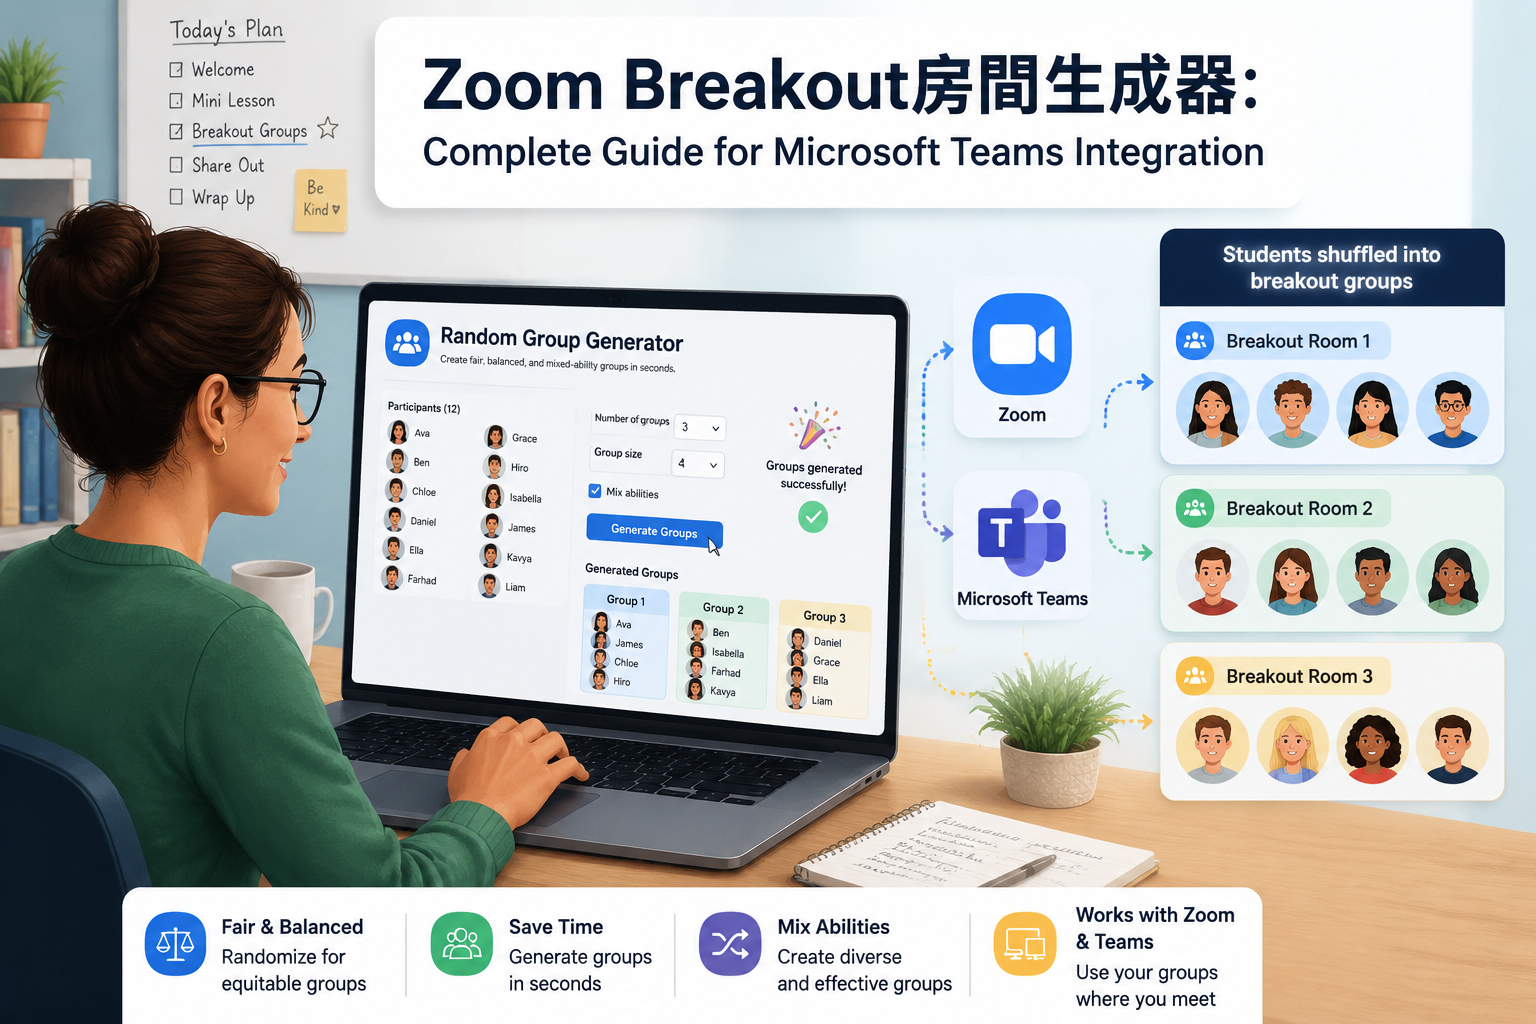
Whether you’re a teacher running a virtual literature circle or a corporate trainer leading a skills workshop, one of the first headaches you face is how to split participants into balanced breakout groups – quickly and fairly. Manually dragging names around a Zoom or Teams interface eats up valuable session time and too often leaves you with lopsided groups. This is where a Zoom Breakout房間生成器 – a group generator that gives you ready‑to‑use lists for both Zoom and Microsoft Teams – becomes your secret weapon.
In this guide you’ll learn how to use the Random Group Generator to build fair, mixed‑ability breakout groups, then apply those groups inside Zoom and Teams in a few straightforward steps. Whether you have 8 students or 80 employees, you’ll walk away with a repeatable workflow that makes breakout sessions effortless.
What Is a Zoom Breakout Room Generator, and Why Does It Matter?
In simple terms, a Zoom breakout room generator is a tool that creates the group assignments before you launch your breakout rooms. Instead of relying on Zoom’s built‑in random assignment, which offers little control over balance, you use an external generator that respects your criteria – equal size, mixed skill levels, or avoiding always keeping the same people together.
The Random Group Generator (access it here) gives you exactly that. You paste a list of participant names, choose how many groups you want (or how many people per group), and instantly get a fair, shuffled result. The same output can then be typed or pasted into Zoom’s breakout window or Microsoft Teams’ breakout panel. For teachers, it means you never put all quiet students in one room by accident; for trainers, you avoid grouping all junior staff together. It is the quickest route from “I need five groups” to “everyone is placed and ready.”
Because both Zoom and Teams require manual assignment when you want full control, having a pre‑generated group list you can follow saves enormous time and reduces errors. The rest of this article shows exactly how to do that.
Step 1: Generate Balanced Breakout Groups with the Random Group Generator
This stage is independent of your video platform – you can prepare your groups days ahead or five minutes before a meeting.
- Gather your participant list. Open a plain text file, a spreadsheet column, or wherever you keep your class roster or attendee names. One name per line works best.
- Open the Random Group Generator. Go to Random Group Generator on any device. The tool requires no login.
- Paste the names. Click inside the input area and paste your list. Suppose you have 24 students. The tool instantly recognises each name.
- Set your grouping rule. You have two options:
- Number of groups – type
4and the generator splits the 24 names into four groups of six. - Members per group – type
6and you again get four groups of six.
- Generate. Click the “Generate Groups” button. The algorithm (a cryptographically secure shuffle) distributes names without bias. You see four clean groups, colour‑coded and easy to read.
- Check and tweak. If you spot that one group contains two students who shouldn’t work together, you can manually swap names within the interface. The generator keeps sizes balanced even after manual adjustments.
What you now have is your ideal breakout room list. You don’t need to export a file; just keep the web page open or copy the group layout to a note.
Step 2: Using Your Generated Groups in Zoom Breakout Rooms
Zoom’s breakout rooms allow the host to pre‑assign participants, but the native “random” option doesn’t consider skill balance. Here’s how to combine your generator list with Zoom’s controls for a much better experience.
A. Before the meeting (pre‑assignment)
If you’ve collected attendee names ahead of time, pre‑assigning them in Zoom gives the smoothest experience.
- Open the Zoom meeting scheduling page. Check the “Breakout Room pre‑assign” option during setup.
- Import names or type them. Zoom lets you create rooms and assign participants manually. Use your generated groups as a guide: create four rooms (Room 1, Room 2, etc.) and type each member’s name exactly as it appears in your generator list.
- Save the meeting. When you start the meeting and open breakout rooms, participants will already be in their designated rooms. No dragging needed.
If you can’t use pre‑assignment because attendees change, follow the next method.
B. During a live meeting
- Start your Zoom meeting and open the Breakout Rooms panel.
- Create the number of rooms matching your generator output.
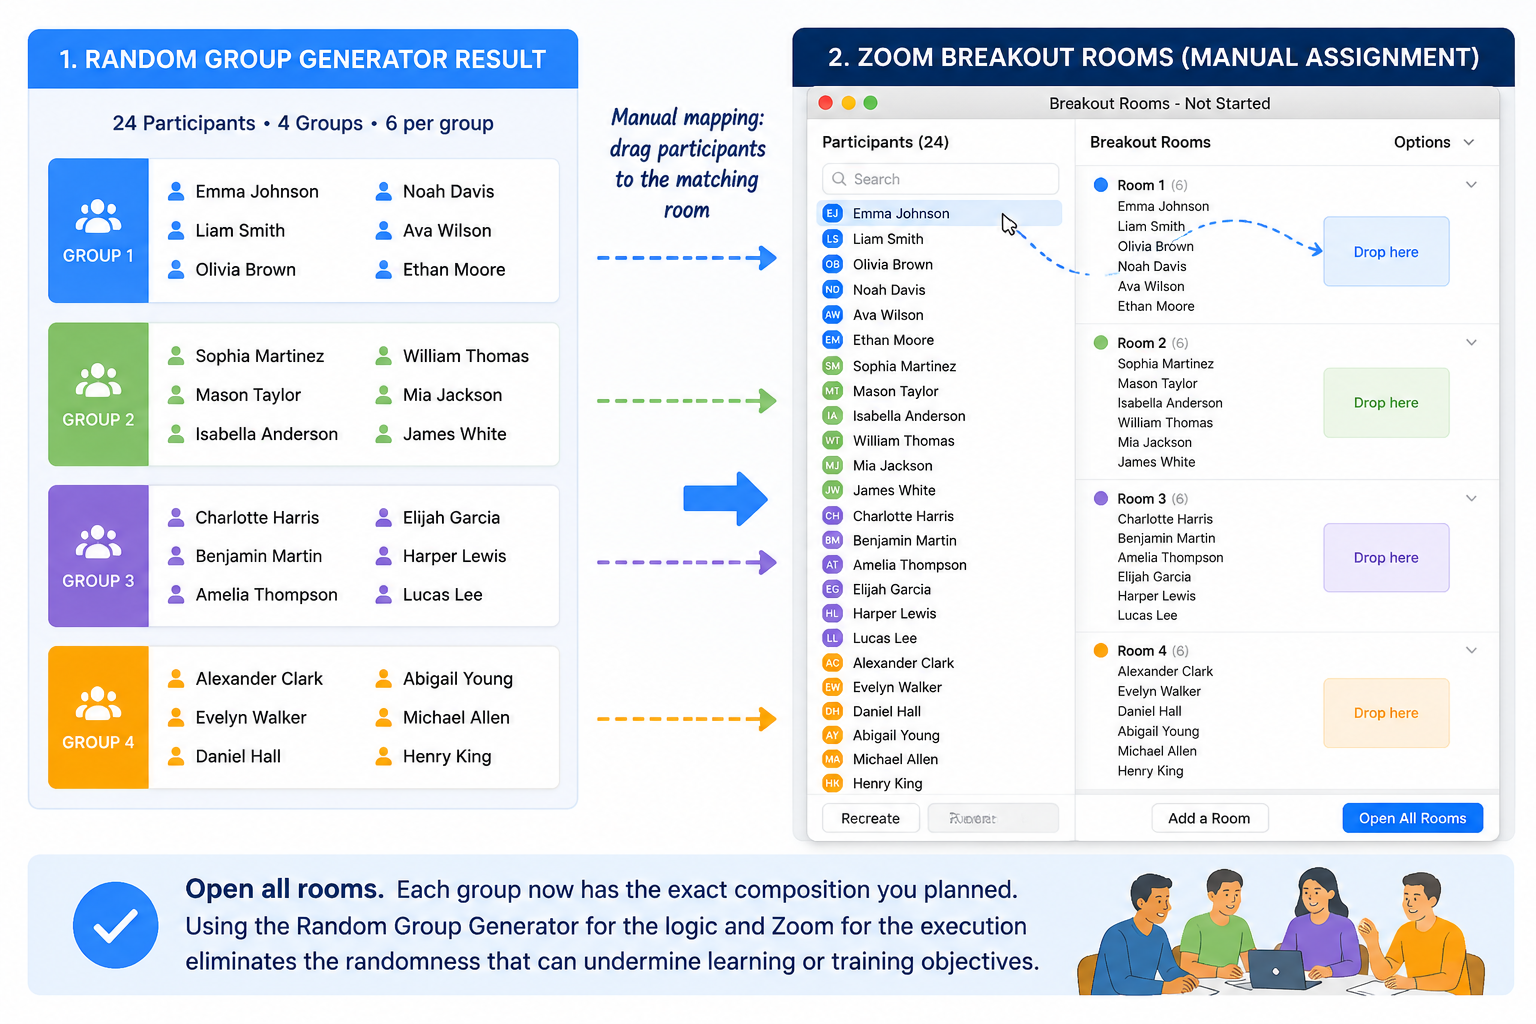
- Manually assign by selecting each participant and choosing their room, referencing your generated list. With the list next to your Zoom window, this takes less than a minute for 24 people.
- Open all rooms. Each group now has the exact composition you planned.
This combination – using the Random Group Generator for the logic and Zoom for the execution – eliminates the randomness that can undermine learning or training objectives.
Step 3: Using Your Generated Groups in Microsoft Teams Breakout Rooms
Microsoft Teams also supports breakout rooms, and the integration path is very similar. Teams requires the organiser to assign attendees to rooms, either automatically or manually. Again, the Random Group Generator gives you the optimal manual assignment.
A. Before the meeting (meeting options setup)
Teams currently does not support importing a pre‑assignment file for breakout rooms in standard meetings, so the live method is more common. However, you can create the meeting first, then edit the meeting options to assign rooms manually before participants join.
- Schedule a Teams meeting and open “Meeting options” (via the link in the meeting invite).
- Enable breakout rooms in the options.
- Create rooms (e.g., four rooms) and assign attendees from the invite list using your generated groups as the blueprint. This requires matching like in Zoom.
- Save the configuration. When the meeting starts, the rooms and assignments are ready.
B. During a live Teams meeting
- Join the meeting as organiser and click the “Breakout rooms” icon in the meeting toolbar.
- Choose “Manually create rooms.” Teams will ask how many rooms you want – enter the number from your generator.
- Assign participants. Click “Assign participants” for each room and select the names according to your group list. Teams will remember these assignments once set.
- Start the rooms. Your generated groups are now live.
Just as with Zoom, the generator does the heavy lifting of forming well‑balanced, fair groups, while Teams provides the infrastructure. This two‑step method is particularly useful for training sessions where you mix departments or experience levels.
Real‑World Example: Literature Circles in a 7th‑Grade Classroom (Zoom)
Mrs. Alvarez teaches 28 seventh‑graders in a hybrid classroom. She wants four literature circle groups, each with a mix of strong readers, reluctant readers, and at least one talkative student. She used to spend ten minutes swapping names in Zoom, often ending up with one quiet group and one overly loud group.
This week she tried the Random Group Generator. Before her 9 a.m. Zoom class, she pasted all 28 names, selected four groups, and generated. She saw that one group had three quiet students; using the tool’s swap feature, she exchanged one quiet student for a more vocal peer from another group while keeping sizes even. She then opened her pre‑scheduled Zoom meeting, created four breakout rooms, and typed the six names for each room. During class, she announced the breakout and the students found themselves in balanced, lively discussion groups. The result: every group stayed engaged, and Mrs. Alvarez gained back ten minutes of instructional time.
She now saves time before every new unit by keeping a master class list ready and generating fresh groups in under a minute.
Real‑World Example: Corporate Sales Role‑Play in Microsoft Teams
A sales enablement trainer, David, runs a monthly product‑pitch session for 50 global sales reps using Teams. His goal is to create groups that mix tenures and regions so junior reps learn from senior colleagues. The built‑in Teams random assignment often creates homogenous groups, missing the mentoring aspect.
David started by exporting his attendee list from the CRM. He pasted the 50 names into the Random Group Generator and set “5 members per group,” giving him ten balanced groups. He quickly skimmed the output and spotted one group with four new hires; he swapped two members to spread the experience evenly. During the Teams meeting, he manually assigned each room using the list. After opening rooms, he noticed that conversations were richer and junior reps reported learning much more than in previous random groupings. For David, the generator turned a chaotic coordination task into a predictable prep step that improved training outcomes.
Tips for Smooth Breakout Sessions
- Name consistency is critical. Use exactly the same display names in your generator list as participants use in Zoom/Teams. Mismatches force you to hunt for correct names during the live session.
- Plan for late‑joiners. Keep a spare group slot or be ready to drop a latecomer into an existing room. The Random Group Generator can quickly regenerate a new set if the participant list changes significantly before the call.
- Pair your generator with a timer. After groups are formed, use a visible timer (many tools available) to keep each breakout segment on schedule. Clear time boundaries help groups stay focused.
- Use the group output for more than just names. The colour‑coded list from the generator can be screenshot and shared in chat so participants can immediately see which group they belong to, reducing confusion.
- Double‑check room settings. In both platforms, ensure “Move participants automatically” is set if you want them to enter rooms without accepting. This small setting prevents delays.
Frequently Asked Questions
Can I automatically send groups from the Random Group Generator to Zoom or Teams?
Not through a direct, one‑click integration at this time. The generator creates the balanced group lists, but you must manually assign those names in Zoom or Teams breakout windows. This method takes only a few minutes and gives you full control over recipient placement – something automatic syncing often compromises.
Does the Random Group Generator work with Google Classroom or Slack?
Yes, you can use the generated group lists in any platform that supports group activities. For example, you could create private Slack channels matching the groups. The generator itself is platform‑agnostic; its output is a plain list of names that you can use wherever you coordinate people.
How do I ensure equal group sizes when the total number of participants isn’t divisible?
The tool automatically distributes the remainder. For example, 23 participants into 5 groups gives three groups of 5 and two groups of 4. You can also lock certain participants to specific groups beforehand using manual swapping, and the sizes will stay as even as possible.
Can I save and reuse group lists across different sessions?
The generator doesn’t store data – for privacy it works entirely in your browser. But you can copy the output into a document or note for reuse. For recurring classes, many teachers paste the saved list back into the tool and hit generate again to reshuffle, which maintains the same participant set but yields fresh groupings.
What’s the advantage of using a generator over Zoom’s random breakout feature?
Zoom’s built‑in random assignment doesn’t consider pedagogical or training needs such as language pair requirements, mixed abilities, or avoiding cliques. The Random Group Generator puts you in control while keeping the selection fair. You also get a clear record of the grouping that you can share with co‑hosts or assistants.
Make Every Breakout Room Count
Running successful virtual breakout rooms isn’t about luck – it’s about a reliable preparation routine. By separating the group planning (done quickly with a dedicated generator) from the room execution (handled by Zoom or Teams), you stop wasting time on logistics and start spending time on the human interaction that makes breakouts valuable.
Your next step: head over to the Random Group Generator, paste your participant list, and see how a few clicks replace minutes of anxious clicking during a live session. For different grouping needs, you might also explore the Random Pair Generator for partner activities or the Random Student Picker when you need to call on one person at a time.
Balanced, fair, and stress‑free breakout groups are just a generator away.